Development Guidelines
Node.js 18+, pnpm 9+
1. Fork repository
Open the alova repository fork page, click "Create fork" to fork the repository, and clone the forked repository to your local machine.
2. Clone the project to your local machine
Use the git clone command, or the Github Desktop application to clone the project.
3. Create a pull request
You can create a pull request by forking the repository after writing the code, or you can submit the code in any number of commits instead of submitting the entire code at once.
4. Code locally
Install dependencies
Use pnpm install to install dependencies.
Install recommended plugins (vscode)
If you use vscode, you will be recommended to install the following plugins:
-
eslint: Check code quality
-
prettier: Format code
-
jest: Automatically execute unit test cases, and execute a single collection or unit test case
-
EditorConfig: Ensure consistent file format
Project structure
alova is a monorepo project with the following structure:
|-.github
| |-ISSUE_TEMPLATE -> github issues template
| |-workflows -> github action
| |-DISCUSSION_TEMPLATE -> github discussion template
| |-pull_request_template -> github pull request template
|-.changeset -> changeset configuration
|-.husky -> husky configuration
|-.vscode -> vscode configuration
|-examples -> alova example project
|-internal -> Public module for test cases
|-packages -> Project source code
|-scripts -> alova-scripts scripts
|-Other configuration files
Coding standards
Code format
Please install the recommended plugins. prettier and eslint will automatically format the code every time you save the file, so you don't have to worry about the format.
Reuse code as much as possible
Public variables and methods are defined in packages/shared. Please browse them first and reuse them as much as possible.
Typescript
-
When writing typescript types, please try to write appropriate types and narrow the type range.
-
The types of
packages/alovaandpackages/clientpackages are manually written. When modifying them, please make sure thattypingsofpackages/alovaandpackages/clientare also updated synchronously.
5. Unit test guide
After writing the code, add the corresponding unit test cases and try to include tests for edge cases.
The alova project uses jest as the unit testing framework and msw as the mock server. It is recommended to use the TDD mode. After each code modification, run the corresponding unit test and pass it.
When you create a pull request to submit code, please make sure that all unit tests pass. If you find any problems, you can submit it again, and the GitHub action will automatically run again.
Add test cases
Unit test cases for each package are stored in the packages/[packageName]/test folder. Please find the corresponding test case file and add your test case. If there is no suitable test collection, you can create it yourself;
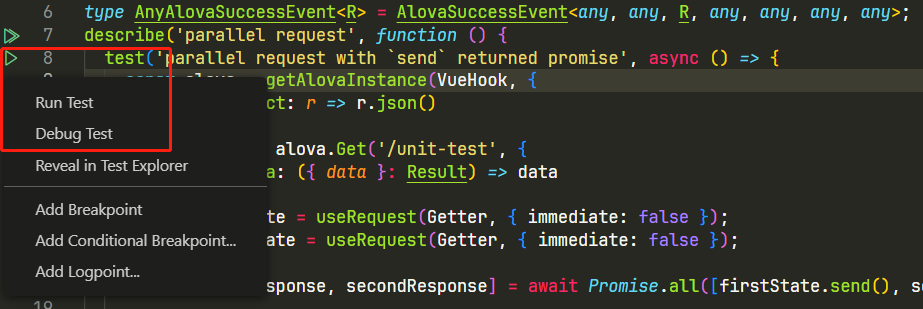
Run and debug a single test case or collection
It is recommended to use the jest plug-in (one of the plug-ins recommended above) to test a single test case or collection. You can right-click in the test case to run the specified test case, select Run Test to run this test case, and select Debug Test to debug this test case, as shown in the figure:
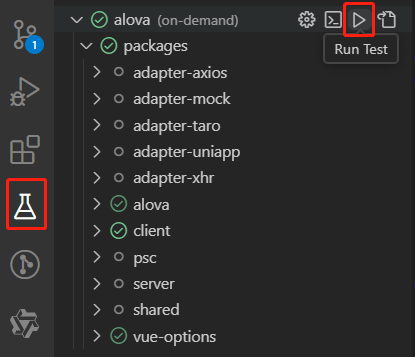
Run all test cases
- Use the jest plug-in to run, as shown below:
- You can also run unit tests through the command line
pnpm run test
6. Submit code
alova uses changesets as a release tool, which can help us automatically generate CHANGELOG to increase the version number and release, but you need to submit the code according to the following process.
-
Tell changeset which packages have been changed. Use the
pnpm run changesetcommand, which will guide you to fill it out in an interactive way. -
Submit the code to the remote repository. You need to make sure that the message format of the submission follows the Commit Information Convention. It is recommended that you try to use
pnpm run committo automatically generate a git message that meets the specification. -
Create a pull request and wait for merging.
7. Add documents
If you are adding new features, try to add relevant documentation for the new features. Please read Correct or add docs for details. Otherwise, please explain it in the pull request.
 Is using alova in your project? please tell me!